A few months ago, gripped by baking fever, I purchased Mary Berry's Baking Bible. I quickly decided to embark upon a mission to bake everything in the book, and turn myself from an occasional baker into a bit of an expert. My Grandad Ern was a Master Baker by trade; the man responsible for introducing Danish Pastries to England in fact, and I wish it had occurred to me to spend more time learning from him, rather than simply enjoying the fruits of his effortless labours. This project is almost a way of making amends for that; I'd like to follow in his footsteps (if not in my career, at least as a hobby) and continue the proud heritage of baking in my family.
I credit my friend Rachel with the idea to write a blog about my baking exploits, hoping that there will be more successes than failures as I attempt all 213 of the Queen of Baking's recipes.
So as not to bore the husband with a monotonous diet of sponges, followed by weeks of biscuits, I've decided to tackle the recipes by selecting the first bake from each chapter, followed by the second recipe and so on. I'm not going to pick and choose; I'm determined to face my baking demons and learn how to do everything baking-related, even if the consequences are disastrous!
Everything will be photographed, with comment about how I found baking it, and a husband rating (to be taken with a pinch of salt as he has a very selective cake-tooth).


Sunday 9 December 2012

Mince Pies

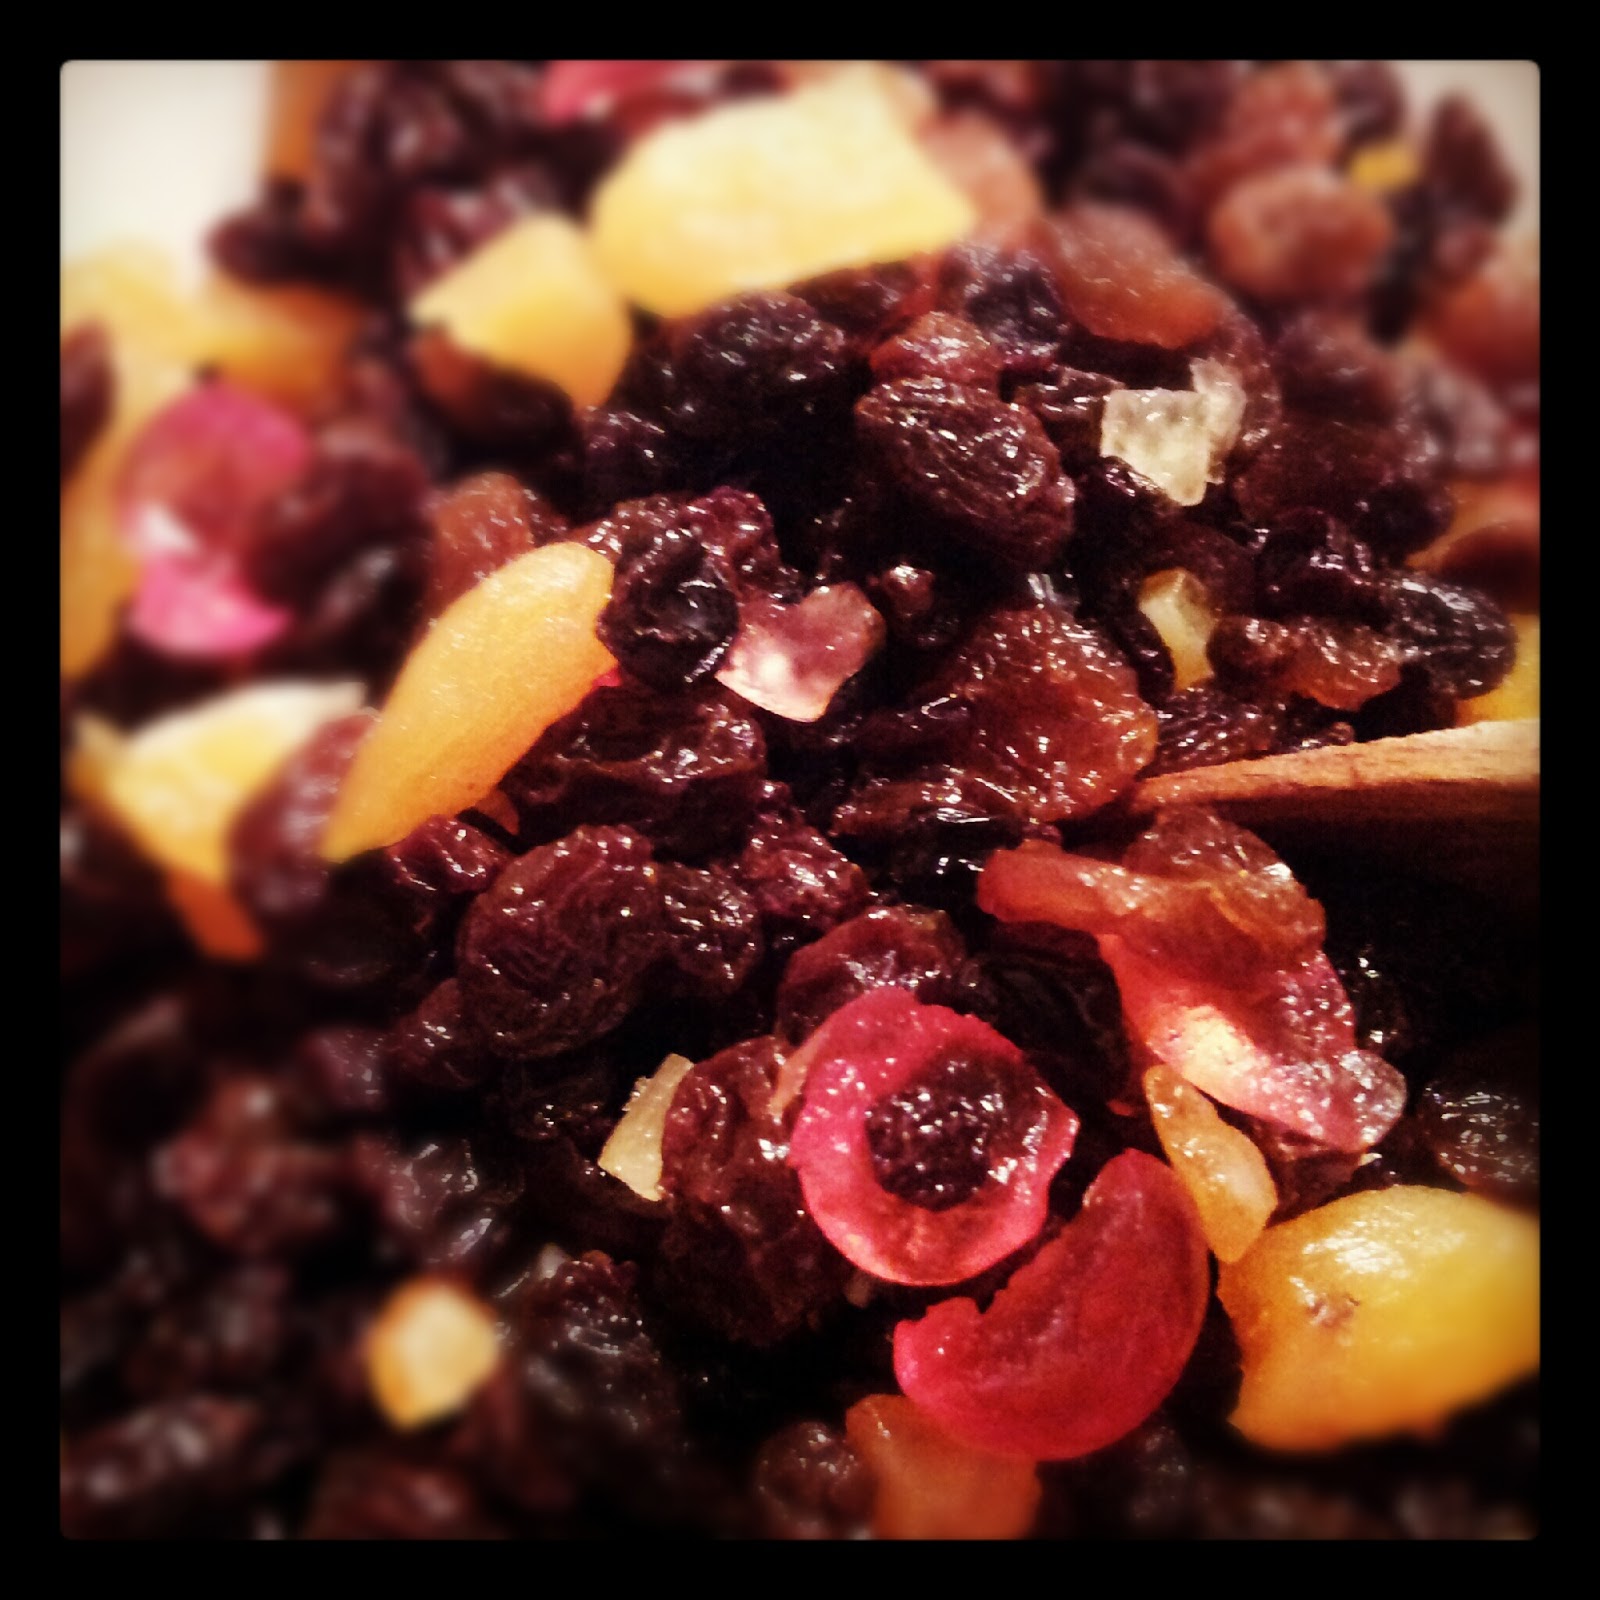
Here is my first attempt at homemade, totally from scratch, mince pies. After having a very disappointing experience with some 'luxury' shop-bought ones, I was even more keen to make my own, and determined to make the mincemeat myself as well. No short-cuts for this baker! Unfortunately Mary doesn't have a recipe for either mincemeat or mince pies in her book, so I had to look elsewhere. I turned to Nigella for the mincemeat recipe and found it very straightforward, except it didn't specify how small to cut the apples, so I've got some quite big chunks! It consisted of bramley apples, raisins, currants and glace cherries, as well as chopped blanched almonds. Dark brown sugar was melted into some dry (Suffolk) cider to start with, and then all the fruit was added, to then simmer away
for about 30 minutes - until the mixture became 'pulpy'. I'd anticipated the apples turning to mush, which was why I didn't cut them too small. In the end, I fished as much apple out as I could be bothered to, and cut the chunks smaller. I'd already sterilsed the 4 x 50g jars by washing them in hot soapy water, rinsing them with freshly-boiled water and then drying them in a warm oven, so all that remained to do was add 6 tablespoons of brandy and distribute the mixture across the 4 jars, sealing them nice and tight. I used the rubber-seal jars rather than classic screw-top ones; they were what I found when shopping, but they also look good for gifts. We sent one of our friends home with a jar for Christmas. 
One week on, and I thought it was time to tackle the pie-making. Husband did a quick bit of research on his phone to find a recipe and stumbled upon one on the BBC Good Food website which had favourable reviews. I'm going to add the recipe here - as much for my own future reference as anything else - as this is a real gem and produced fantastic mince pies. I'd been worried about my pastry; I've made a lot over the years, but it's always been a bit tough and I've never made really short pastry before, which is essential for good mince pies. Well, this was so short you could never hope to roll it out and fiddle about with pastry cutters and perfect-looking pies. It was simply a case of pressing balls of pastry into the moulds, filling it with mincemeat and then flattening out a lid with your hands before laying it on the top. I experienced lots of crumbling and splitting, but just had to have faith that all would be well in the end. I knew they'd tast bloomin' good, owing to the amount of butter and caster sugar included. It took me a long time to make them, and I did get myself a bit hot and bothered with all the elbow grease involved, but now I feel confident with them, I'll go into full-on Christmas mince-pie production (to use up all the mincemeat!) They baked for 20 minutes and were cool enough to dust with icing sugar after about 45 minutes of being out of the oven and cooling on a wire rack. They didn't look beautiful; 'rustic' is the most favourable way to describe them. That said, they did look very appetising. You just knew they'd be good to eat.
Baker's verdict: quite fiddly and labour-intensive (the whole process), but so rewarding. I don't think I'll buy mince pies from a shop ever again. Best tasting mince pies I've ever eaten. Lovely cold, or warm with some creme fraiche.
Husband rating: 10/10 - the perfect mince pie. Buttery, crumbly, great filling. The best mince pies I've ever had.
 
Recipe:
Rub 225g of cold, diced butter into 350g of plain flour. Add 100g of golden caster sugar and a pinch of salt. Bring together into a ball, kneading briefly.
Pre-heat the oven to 180 (fan) and lightly grease 18 holes of a bun tin.
Form the pastry into walnut-sized balls and press into the tin.
Measure out 280g of mincemeat and divide the mixture between the pies (about a teaspoon in each).
Pat smaller balls flat in your palms to make the lids and just press lid and base together.
Beat 1 egg and brush the tops of the pies with the egg wash.
Bake for 20 minutes until golden; leave them to cool in the tin for 5 minutes and then use a knife to gently lever each pie out of the mould (they come out very easily).
Leave to cool and then dust with icing sugar.

Thursday 6 December 2012

31. Banana Loaf

What to do with some over-ripe bananas? Bake banana bread of course! I've made this several times before, although not to Mary's recipe, so knew it would be a nice, straightforward bake. I did worry that the bananas might be that little bit too mushy, but the recipe stipulated 'the riper the better' and actually they weren't too bad when I peeled them. The recipe was very easy - no bells and whistles needed, just the usual mixture for a sponge (following the all-in-one method) with the bananas added, which I'd mashed up beforehand.


The only issue I had was with the size of the loaf tin. I had a large one and two small ones; neither of which were labelled by weight. I didn't dare rely on my intuition, so I just checked the size of the tins I used for the malt loaves I baked earlier in the year and established I'd used two 1lb tins. So instead of baking one big loaf, I made two small ones. Very handy for stopping over-indulgence. There is now a lovely banana loaf nestling in the freezer for future emergencies. For small cakes, I was surprised they needed an hour to cook; something warned me that splitting the mixture into two smaller tins might require less cooking time, so I opted for 45 minutes instead, and they were cooked perfectly.
Baker's verdict: really simple to make; a great bake for those spontaneous baking urges! Tasted great.
Husband rating: 7.5/10 - totally guessing because I can't remember. I think I enjoyed it! (He did - I have a better memory, but must remember to update my blog in a more timely fashion)
UPDATE: I've baked these a couple of times since, and today (18th June 2013), husband has decided to give them 9/10 - they're lovely and moist, almost gooey but light at the same time. Nice pieces of banana in it and really strong banana flavour. The edges were nice, almost a bit crispy.

Saturday 17 November 2012

30. Quick Granary Rolls

This has been my first real baking disaster, and I'm determined to include everything in this blog! I intend to have another go at this, but at the time I vowed "well, that's it! That's that recipe done!" Basically, this picture shows how far I got. Note the greased baking sheets in the background; note the 'dough' in the bowl. It was more like a lumpy Yorkshire Pudding batter than a bread dough! I was furious, mostly with the recipe, but partly with myself for being in so much of a rush that common baking sense didn't kick in. Clearly, there is too much liquid. There is a massive flaw in the recipe, which instructed me to add 'about 450ml each of tepid milk and water, mixed.' I read over and over that after my disaster, even got my husband to read it. There's only one way to interpret it: 900ml of liquid in total. What, after reading other recipes, it meant however, was that 225ml of each liquid should be mixed to make 450ml in total - and even that's pretty wet for bread. Because the method advised to pour the liquid in a continuous stream, I didn't pause to think about how wet the dough was going; only realising that disaster had struck when I got my hands in at the end. There was no way this was going to be kneaded to form a smooth dough! I had two options: add more flour and salvage it, or chuck it away. I threw a massive wobbly and did the latter, swearing profusely as I did so. I just had visions of potentially wasting even more of my ingredients if I added more flour, so I thought it best to give it up as a bad job.
I've read the blogs of others doing this project and the same thing happened to them; it's an obvious fault with the recipe. I shall attempt to make these at some point soon, doing a bit of research on what the quantities of liquid ought to be first.
Watch this space...
 
 
June 2013: revisiting the rolls! I always intended to bake these properly, and a quick flick through the book helped me out with the quantity of liquid. The recipe is very straightforward, and I managed to make these while the baby slept in her bouncy chair in the kitchen. The dough was still quite sticky and took a fair bit of kneading to get it 'smooth', but I felt happy with the texture of the rolls and managed to get them to a fairly uniform size. I'm not usually very good at this, but obviously there are issues with the baking if there's an assortment of sizes! The hardest part was wrestling with the cling film and oiling it before covering the rolls. I really hate cling film. For all it's great uses, it's an absolute sod to handle! Anyway, I popped the rolls into a warmed oven to prove, in the absence of anywhere suitably warm in the house. I left them until a convenient time arose for baking (working around the baby) and was pleased that they only took 10-15 minutes. It meant that I could have one for my lunch. I do wonder if I over-proved them though, because they really increased in size (although I suppose they only doubled, as per the recipe), and they also got really bubbly. I think this is normally where 'knocking back' is done in bread-making, to bash some of the air out, but there was no instruction to do this so I left them as they were. I gave them 12 minutes to bake, a little bit less than the recipe advises, and gave them a tap. They sounded hollow and were a nice colour, so I was happy with that. There was a difference in colour depending on which shelf of the oven they were baked on, but that's to be expected and they were all baked sufficiently. I was really please when I cut one open - I can't think of anything wrong with the texture and 'crumb'. I do feel insecure about my bread-making; it's quite unfamiliar territory for me really. I wish I'd had more lessons from Grandad so I knew what to expect from each process. But this is why I'm doing this project, to learn more about baking. At the end of the day, if it looks and tastes good, then that's good enough. Unless I become a pro that is!
Baker's verdict: really easy to make and very tasty. I thought they looked lovely cooling on the rack.
Husband rating: 8/10 - good bread rolls. Made nice sandwiches; nice with butter on.

29. Classic Sticky Gingerbread

Just out of Bonfire Night season, it seemed appropriate to have a go at this bake, made for visiting friends (and now seasoned cake testers!). I've always liked gingerbread so was looking forward to making and eating this. Unlike the gingerbread I made earlier in my project, this one didn't require the inclusion of porridge oats. I was relieved about that, as I didn't really enjoy the 'chanky' texture produced by the oats in the last recipe. This one just relied on the usual cake mix, plus treacle and golden syrup.

Something that troubled me slightly about the recipe was Mary's description at the beginning - a warning that if it sank in the middle, it would be because you'd been 'a bit heavy-handed with the treacle'. I wasn't sure how that works when you measure ingredients as rigidly as I do, using electronic scales, and when a precise quantity is given in the recipe. What's a girl supposed to do? I followed the recipe; when it first came out of the oven (see above) it was well-risen, but sinkage followed (see right), and it seemed that the treacle was responsible. I felt frustrated by this; what's the point in following a recipe if it dooms you to failure? As if I'd contemplate tinkering with quantities at this stage of my baking career! I did worry that I'd not baked it for long enough, but wasn't convinced by this.

The worst thing that happened was that the cake was quite squidgy in the middle. There are worse cake-crimes, and actually the gooiness was quite nice. Better 'sticky' (as the recipe title dictates) than crumby and dry, surely. Indeed, one of our guests requested a sticky slice from the middle of the cake rather than a piece I labelled as 'more done'. It was quite difficult to slice, with it being quite sticky, but I managed to get it into 16 good-sized squares. We had a slice each cold (forks needed), and then on subsequent days had it warmed up with custard. It tasted great both ways.
Baker's verdict: easy to make; handling golden syrup and treacle is always a bit of a nuisance, but I enjoy the whole 'melting' process. Tasted really, really good. It also kept well: I had my last piece 5 days after baking it. I'd definitely make this again, and maybe reduce the treacle by 50g to see what happens...
Husband rating: 9/10 -  delicious cake, tasty, moist and great with custard warmed up.

Thursday 8 November 2012

28. Melting Moments

Biscuit time again! These are somewhere between a cake and a biscuit to an extent: there's an egg yolk in them and they looked a bit like little flat sponges when they came out of the oven. There was a distinct 'merging' of the biscuits; 18 per baking tray did seem like a lot, and it's not like you can obtain/use giant baking sheets! These were very easy to make; I interpreted the 'few drops' of vanilla extract my way - what did I think would be needed to make them taste of vanilla? I used my nose as my guide. Making 36 equal-sized portions out of a big ball of dough is always a bit of a challenge, and I don't have much of a head for division. I split the mixture into two - one lump per tray and then worked from there. They were as close to equal in size as I could be bothered to get them! I flattened the biscuits out in the oats rather than rolling them in the oats as balls - none of the oats were sticking that way. It's always satisfying when you find something out for yourself. The biscuits soon baked, the ones on the top shelf a bit browner than the others, but not 'overdone' as far as my novice opinion goes. The paler ones were softer when we ate them, but had more of a biscuit 'snap' after storing for a day. I ran a knife between them while they were still soft to retain a bit of a shape to them - I feared there'd just be a pile of broken biscuits at the end of it if I left it until they'd cooled.
Baker's verdict: tasty, very very tasty. Buttery and light and very edible. Easy enough to make.
Husband rating: 8.75/10. Absolutely beautiful but didn't give them a 10 because they're quite simple. Very moreish. Preferred the ones which were under-baked as they were slightly chewy.

27. Classic Rich Christmas Cake


Here it is, my first ever Christmas cake. Baked during the October half-term holiday to allow plenty of 'feeding' time. It happened to be the next fruit cake on my list: I may skip through the chapters to find other Christmas-related bakes while I'm at it though. Anyway, stage one involved getting all the fruit chopped and mixed. There was a lot: raisins, currants and sultanas, as well as apricots, glace cherries and chopped mixed peel. They made a colourful, very festive-looking concoction, eagerly awaiting the 3 tablespoons of brandy to bathe in. My current abstinence from alcohol made this soaking both heavenly and hellish - breathing in those aromas just a little bit of torture but lovely nonetheless!

The fruit had to soak, covered, overnight. By the morning everything had plumped up nicely, and I resisted the urge to pop a boozy raisin into my mouth. Day two involved the cake bit: very straightforward, but physically demanding. My worn-out electric whisk wouldn't have coped with mixing this lot up so it was wooden spoon action all the way. What did make it a bit easier was adding the fruit to the 'wet' ingredients bit by bit. Sometimes there's a danger of the flour not being mixed in properly - this wasn't an issue; I did, however, have my customary butter problems again. I think I need to go one step beyond 'squeezably soft' and whip the butter to a paste before I chuck it in with the other ingredients.

As it was, I just tried to blend in any larger masses of butter as I mixed. There weren't many, and I knew that the baking would help to disperse it further, but I do wonder if it's this (as well as the loose-bottomed tin) which contributes to the buttery leakage at the bottom of the oven. At least I'd predicted this: I put a baking tray beneath the cake-tin to catch the drips. It is frustrating though: surely not that much butter should leak out. Perhaps the cakes are trying to cut our calories for us...
The cake baked for 4 and a half hours and filled the house with the rich aroma of Christmas for a good 2 of them. I don't think there is any better smell, for the warm and fuzzy associations it creates. I wish smells could be bottled and captured forever. The skewer came out clean after that time (the minimum suggested); the cake looked and smelt great, with no hint of charring (a result of covering the cake with some baking parchment). It did flatten the top a bit (my fault for pressing it down and not laying it 'lightly' on top to start with), but this also created some little flaky bits to pick off and nibble!
My blog for this cake needs to pause here, pending comments on the taste etc when we get to Christmas! Six and a half weeks to go...
 
Christmas 2012
 
And now, after two months spent waiting for all that lovely brandy to soak in and work its magic, here we have the finished article! I 'fed' it at the end of November with several tablespoons, and then wrapped it back up; when I unwrapped it on Christmas Eve it smelt lovely, and felt nice and moist. I was a bit of a renegade when it came to the icing, realising too late that you're meant to leave a 24-hour gap between marzipan and icing. I also cheated by buying the ready-made stuff. Mary says it's ok, and life's too short...

I was anxious about the covering of the cake, having never worked with marzipan or royal icing before, but was relieved to find the whole process much simpler than I thought. I had far too much marzipan by the time I'd rolled it out to the required thickness (nice and thin), so Mum and I made some petite fours with the leftovers. I initially forgot to put the apricot jam on, so had to gently lift it off and apply said jam to seal it to the cake. I then left it to 'dry' for a few hours before rolling out and placing the icing. Again, this was easier to work with than expected, and I managed to get a nice smooth finish.

I'd toyed with the idea of messing about with food colouring to get some authentic-looking holly as decoration, and also with buying some edible glitter, but didn't feel especially inspired by what was in the supermarkets. In the end, I thought 'less is more' and just used my new Christmas cutters to cut out some stars and holly (in honour of the two names given to my poorly little cat) and dressed it up with a nice festive ribbon. I was very pleased with the end result; sometimes Christmas cakes can look a bit gaudy in my book!
And so to the taste. I was really pleased with the cake: it retained its moisture and had a lovely flavour, not too overpowering with brandy. It didn't feel dry, or sticky: the texture was just right. I also liked the balance between cake and marzipan + icing. Because I'd kept the layers quite thin, you didn't get a massive sugary hit from the topping, just a nice balance with the cake.
Baker's verdict: this will do nicely as a Christmas cake to make year on year. Enjoyable and straightforward to make and very tasty.
Husband rating: 7.5/10 - great Christmas cake, but I'm not a massive fan of Christmas cake. Tasty, but not my kind of cake.
Mum and Dad rating: 9.5/10 - the only thing which would improve this is bigger pieces of cherry.
Mother-in-Law comment: 'the best I've ever eaten'. 

Tuesday 6 November 2012

26. Chocolate Victoria Sandwich

At the request of my friend Rachel, who asked for either a Victoria Sponge or a chocolate cake, I rustled this up for afternoon tea. Because of the size of my tins, I had to adapt the recipe slightly (just by using the Victoria Sponge guidelines), but something I was really surprised about was the relatively small amount of cocoa used. It also wasn't sifted in with the other ingredients, but mixed with a little water first - not how I'm used to making a chocolate sponge! Not suprisingly, the cake didn't look very chocolatey when it came out, nor did it smell very chocolatey. Having the Devil's Food Cake as a comparison didn't help, but this (as you can see) was a very pale chocolate cake indeed! It did seem to bake differently compared to the Victoria Sponges I've made - it actually feel apart a bit when I put the buttercream on. I did flip it over a bit on the cooling rack though, trying to keep the indentations off the top of it, and know I shouldn't have done that. Lesson learnt: don't manhandle warm sponges! The filling and topping was just the usual buttercream, with some chocolate grated on top. It tasted nice, but just generically of 'cake'. It didn't feel like a chocolate cake experience to me at all!
Baker's verdict: a good cake, but not a yummy one. Easy to make, but definitely needs more cocoa!
Husband rating: 7/10 - nice sponge cake but nothing chocolatey about it.
 

Sunday 7 October 2012

25. Devils' Food Cake

I was really excited about baking this; it looked fairly straightforward and was bound to be tasty. The only challenge I envisaged was the frosting: never made 'frosting' before, and it looked fraught with hazard potential! Unfortunately my fears were realised, and this has been one of the few bakes I've done thus far which I've felt genuinely disappointed with. The cake itself was very easy to make, but one of few deviations from the 'all-in-one' method Mary seems to favour. It involved creaming the butter and the sugar together first, before adding the rest of the ingredients.
Also, the cocoa powder was mixed with water before adding to the cake batter; this made for a very wet mixture which would inevitably turn into a moist, fudgy-textured cake. I gave the cake 32 minutes in the oven; it was well-risen and a great colour. When I turned the sponges out of the tins, they were both very dark and sumptuous, and smelt lovely. I then had to leave them to cool right down before preparing the frosting. As it turned out, the art of making the frosting wasn't a difficult one to master, although I did resort to using the electric mixer towards the end as my hand whisking was feeble to say the least.

The mixture consisted of caster sugar, an egg white, a pinch of cream of tartar and some hot water. It had to be continuously whisked over a pan of 'hot water', and here's where the trouble began. For precision baking (such as it is), I need clearer instructions. I used my own judgement and set a pirex dish over a pan of boiled water, set on a medium-low heat. I thought if I retained the 'hotness' of the water, things would be ok. The recipe said nothing about 'boiling' or 'simmering'. So, whisking away to very little avail, I used the electric mixer to get the 'firm' texture described, thinking that the desired texture would be the only issue. It was only when I'd finished whisking that it occurred to me that there might actually be an issue with me testing it, and indeed eating the cake. Being pregnant, raw eggs are an issue, and I wasn't sure if the light 'heating' method was sufficient to constitute cooking the egg white! Otherwise, I'd have tested the frosting at this stage. Anyway, I spread a small amount on to sandwich the cakes together, and then got to work covering the cake all over. I was quite pleased with the end result; there was no picture in the book to work to, but I managed to create the desired 'peaks' and thought it all looked very appetising.
We didn't sample any of the cake until later in the day (after having decided that the egg-white issue probably wasn't anything to worry about) and were met with immediate disappointment. Chocolate cake = lovely; everything it should be. Frosting = shambolic. The sugar hadn't dissolved properly, so the end result was a very grainy and very soft frosting, which didn't match the description of a meringue/marshmallow texture. I'm now left with the dilemma about how to get the cake eaten. Husband and I will have a few slices sans frosting, but to inflict this on colleagues...?
Baker's verdict: I was so chuffed with my efforts here, and subsequently gutted that it didn't turn out so well after all. I'll master this frosting one day: sugar thermometer will be the next investment!
Husband rating: 7/10 for the cake - lovely bit of chocolate cake; 1/10 for the frosting - didn't like it at all because it was grainy - like eating raw sugar!

Saturday 6 October 2012

24. Classic Apple Pie

I'd been putting this bake off until a suitable occasion presented itself, not because I anticipated that it would be a difficult one. I think pies need guests, so I made it last weekend when my parents were visiting and a pudding was required after the Sunday dinner. It wasn't particularly challenging, but this is probably the last time I'll bake and make dinner at the same time, as I couldn't give it my full attention. It was a pretty basic recipe; I chopped the apples into thick slices and put them into some lemony water to stop them browning, while I made the pastry.
The pastry was a funny one; the first time I've used vegetable fat (like veggie lard) in any recipe. It was the usual case of rubbing the butter and fat into the flour and then binding it all together with water, but it was a bit of a sod to roll out. I couldn't do it without it tearing, but it didn't feel either too dry or too wet to me. It was a faff getting it on top of the apples (which had been sprinkled with sugar and cloves), so I called on the expertise of Mum to help! It then had to chill in the fridge for 30 minutes before baking. Once in the oven (40-45 minutes given as the baking time), it seemed to cook too quickly. After 20 minutes, it needed covering with foil as it was already starting to brown at an alarming rate. I was determined to stick to Mary's instructions, so I left it in the oven while we ate our roast and removed it on the bleep of the timer.
The final result was a bit disappointing. The pastry had held (even the patched-up bits), and was nice and crispy. It tasted very good too. However, the 'thickly-sliced' apples had turned to mush, which I hadn't expected. I don't know if this is how Mary's pie turns out, but the object of slicing the apples in that way was defeated, I feel! A collective theory was that baking the pie in the top oven rather than the larger fan oven meant that it was too close to the heat and cooked too quickly and for too long. I hardly ever use the top oven; on this occasion the chicken was occupying the fan oven (another contributory factor in my decision to keep meal preparation and baking separate).
Baker's verdict: nothing wrong with the taste, and lovely with custard; good pastry, but mushy apples didn't quite do it for me.
Husband rating: 6.5/10. Tasty, but it was a bit like an apple puree with a thin bit of pastry on top (and some burnt bits).

Monday 17 September 2012

23. Bishop's Fingers

I was desperate to do some baking, feeling thoroughly inspired by 'The Great British Bake Off' again, so I decided biscuits were the order of the day - not too complicated, and not at all time-consuming. This variation on the shortbread theme are the next biscuits on the list, so I've tried to stick to my programme of bakes...ish. These are actually very similar to the shortbread biscuits I've already made, both in terms of ingredients, process and end result. The main difference is the inclusion of almond within the mixture. The dough contains both ground almonds and almond extract, so I was expecting a really almondy flavour. I was disappointed. Again I encountered a vague instruction, with only the principle of 'doing everything by the book' to guide me. So, 'a few drops' of almond extract (yes, extract, so therefore potent) was what I put in - the equivalent of a cap-full. It smelt very nice, and I just trusted that with all the almondy ingredients, almond would be the predominant flavour. As it happened, even with the almonds on top, they really just tasted like shortbread, so if I made them again, I'd put a lot more almond extract in. Texture-wise, they were a bit crunchier than the shortbread, having the traditional biscuity 'snap' I like. I will make them again, as they were so straightforward, and there's something so satisfying about kneading biscuit dough!
 
Baker's verdict: easy to make; disappointed with the lack of almond flavour!
Husband rating: 8/10 - very tasty, very buttery, good texture. Would like to be able to taste the almond though.

Friday 31 August 2012

22. Chocolate Chip Brownies


I skipped several bakes in order to obey Mum's second request to bake some brownies for the family party. They needed to be suitable for the children, so I've put the more luxurious ones on hold for now! I think this is the first time I've made brownies; they seem to be popular projects for other bakers, so I've always left it to them. However, they make a change from fairy cakes, and one tray's worth produces 24 brownies of a good size, so they're definitely ideal for a party. They were also very simple to make, following Mary's 'all-in-one' method. I was quite shocked by the amount of sugar that went in: 375g! I suppose it's needed to counteract the bitterness of the cocoa powder, but these are real 'a moment on the lips...' treats and not for regular consumption!

They baked for about 40 mins before I checked them with a skewer, and I gave them my obligatory 2 mins more before I took them out. I was disappoined to find that, once again, there was some sinking in the middle. It didn't really matter with these, as they were destined to be cut into squares, but I'm troubled by my ritual sinking. I know that it can be caused by opening the oven, or by underbaking, but I'm sure I'm innocent of both of these baking crimes, so I'm not sure what to do about it! I think I'm going to try baking for the maximum time next time and see what happens. I really need to experiment with the same bakes, but I'm so off-track with my project that I haven't got the time to re-bake things I've already ticked off the list (she says, having baked about five Victoria Sponges!)

Baker's verdict: easy to make, easy to cut into squares, kept well and tasted very good.
Husband rating: 10/10 - best brownies he's had and liked the chunks of chocolate in them.

Thursday 30 August 2012

21. Quick Boiled Fruit Cake

I'm going to preface this entry by saying that this is, without a doubt, the best fruit cake I have ever eaten. It received masses of compliments by the many family members who partook of a slice, and has ignited a new fondness for a 'genre' of cake I could previously take or leave. High praise for what was actually a very straightforward cake to make, hence the 'quick' in the title. What did take a bit of time, as per usual, was the preparation of the ingredients. I keep making the mistake of pre-heating the oven straight off, simply because it's always the first instruction. Oodles of electricity drains away while I faff about lining tins and measuring things, so I need to get into the habit of doing all that first. The oven doesn't really take very long to reach 160 degrees anyway!
As expected, there is a massive amount of fruit in this cake - currants, raisins, sultanas and glace cherries. No sugar is added but additional sweetness comes from the naughty tin of condensed milk which is mixed up with melted butter and the fruit in a saucepan. Stirring a mixture like this always provides a good workout for the arms! Once it was all melted and lovely, I had to leave it to cool for ten minutes while I got on with the 'dry ingredients'. These consisted of self-raising flour, mixed spice and cinnamon, with a couple of eggs chucked in before adding the fruit mixture. I mixed it all by hand (more elbow grease), and was really careful to make sure all the flour was blended in. It's very easy to miss bits I've found!
Baking time was recommended at between 1hr 45mins and 2hrs; I opted for the former but after testing with a skewer I gave it another five minutes. It was nice and golden on the top and smelt divine - all rich and Christmassy. We were heading out, and I hadn't left enough cooling time, so it sat on the worktop under one of those fly pyramid things just in case we had any unwelcome visitors wishing to leave deposits! It was a heavy beast, which I think actually makes it easier to turn out of a tin and move around.

I made this cake at the request of my Mum, who wanted me to make a fruit cake for a family party. The 'quick' element appealed, as did the fact that it didn't need feeding with alcohol or to sit in a tin for a week or two before eating. It's kept very well; it's now a week since I baked it and there's still a bit left - still lovely and moist. As I said, those who sampled a slice were very complimentary; I was surprised by how much of it was eaten, given the plethora of cakey delights on offer. Pitted against chocolate cakes, I'd always think a fruit cake would have less appeal. I think word got around how tasty it was though. My first taste of it was with some mature cheddar cheese - something husband found very 'pregnant' and peculiar, but the combination was lovely.
Baker's verdict: I will add this to my repertoire of regular 'occasion' bakes; quick, simple and bloomin' delicious. I expect to share the recipe with a lot of people!
Husband rating: 7/10 - bloody good fruit cake but I don't really like fruit-cake, so...
Dad rating: 11/10

Sunday 5 August 2012

20. Iced Fairy Cakes

With the remainder of 'Section 1' of my bakes still outstanding, I now find myself faced with a selection of cakes for really special occasions, like Sachertorte. What to bake for husband's birthday then? Something that would travel well on our short getaway to Norfolk. In the end, I plumped for these: basic fairy cakes with basic icing and artistic license to decorate them in whichever way seemed appropriate! I've cracked sponges now - I made a really light, fluffy mixture and the buns puffed up nicely. 

There always seems to be significant deflation, but I console myself with the fact that it makes it easier to ice flat cakes! They do seem to turn out a bit lopsided, but then I don't fiddle about smoothing down the mixture before they go into the oven. I went for 15 rather than 20 minutes, trusting my judgement about the colour rather than worrying about them being undercooked. I've made too many dry cakes over the years! The cakes were fine; the icing was too runny. It's hard to describe the required consistency in words really; evidently one woman's 'thick' is another woman's 'gloopy'!
The result was an icing that was malleable, but did run down the sides of the cases and make the cakes look a bit messy. Mary's photo shows buns decorated with Dolly Mixtures; as a vegetarian, I had to get the best non-gelatine equivalents I could find and used strawberry and fizzy laces and jelly beans. I was very pleased with the bows! The cakes were very tasty, although the delights of the sponge were a bit lost beneath the sticky sweetness of the icing and the trimmings.
Baker's verdict: very easy to make, and great for a quick cake fix when needed.
Husband (and Birthday Boy) rating: 8/10 - really tasty, excellent sponge. Icing not really my thing and the jelly beans didn't really go with it for me, but the laces were tasty.

Sunday 22 July 2012

19. Florentines

With some recipes still outstanding from my first list, I nevertheless decided to skip ahead and have a go at these. I'd intended to make them for my parents when they visited a few weeks ago (one of my Mum's favourites) and had the ingredients knocking around, although I was annoyed to find that the mixed peel I'd bought a month or two ago was BBE July 2011! I'm fairly reasonable about best before dates, but a year out is a bit much, I feel! This was one of a few adjustments made to Mary's recipe: I do want to do everything 'by the book', but I think it's a good thing that I've developed a bit of confidence and my own know-how so that if I need to be flexible with a few ingredients here and there, I can be. I'm also discovering some useful prep methods, like using the mezzaluna to chop nuts with: much more efficient than fiddling about with a knife.

 
Instead of the mixed peel, I just increased the quantity of glace cherries, to match the intended total quantity of fruit. I'm not a big fan of citrus peel anyway, so this was a modification I think I'd stick with in future. I'd always thought Florentines would be difficult to make; Mary makes the point that an accurate set of scales is a must, and I didn't have any technical problems at all.
At first I thought three baking trays seemed a bit excessive for the quantity of mixture, but as you can see from the before/after pictures on the left, they really did spread out in the oven. The recipe did make 20 biscuits as suggested - again, something I was a bit sceptical about.
The smell of melted butter and sugar (and golden syrup) is always divine, but the smell emanating from the oven as the biscuits baked was something else. It was fascinating to see them spread out and bubble away, and I couldn't wait to eat them. They were very easy to remove from the trays; I let them cool for about 3 minutes before sliding them off with a palette knife and placing them on the rack.
After about 30 minutes of cooling, I melted the chocolate. I used milk instead of plain, because Mum's not a fan of dark chocolate and so I hadn't bought any for making them a few weeks ago. I'd try them with dark in the future as it probably cuts through the sweetness a bit and makes more of a contrast, but they're certainly very tasty coated in milk chocolate! One thing that did confuse me is why there's a need to make a zig-zag on the chocolate after coating the underside of the biscuits. I did it a few times and couldn't see the point! I put the biscuits in the fridge to allow the chocolate to set in a fly-free environment, and we ate the first ones cold, which were very nice. The end result is a toffee-like, chewy, slightly crunchy biscuit.

Baker's verdict: easy and fun to make. I'll definitely make these again, even though there are quite a few processes. Very tasty and pretty moreish!
Husband rating: 7.5/10. Really tasty but just a bit too sweet for me.

Sunday 8 July 2012

18. Madeira Cake

It's been ages since I've baked, although I do keep turning out Victoria Sponges as and when the mood takes me! Life has been hectic and consequently tiring lately, and there have been a shortage of occasions to bake for since I last tackled a new recipe. However, I decided to skip the Bath Buns which I'd put on the back-burner for a few weeks, and make a good old-fashioned cake again. I did actually make this cake months ago, when I first bought Mary's book, but that was pre-blog, and I wanted to make it again. It's a very easy cake to make; much like the classic Victoria Sponge, but with the addition of ground almonds and grated lemon rind. It takes longer to bake too - about 1 hour. I deviated from Mary's recipe only to substitute a round baking tin for a loaf tin - my experiences of eating shop-bought Madeira Cake have always involved the loaf shape and it's much easier to slice. The best bit about this cake is the lovely firm crust it develops; the centre of the cake is quite dense, but not claggy.
Baker's verdict: easy to make; tastes really good; great for sharing with colleagues, and would be good used in a trifle. The blueberries went really well with it.
Husband rating: 8/10 - great flavour; loved the crust. Not as moist as some of the sponges, but easy to eat and tasty.

Monday 28 May 2012

17. Divine Chocolate Birthday Cake

This cake had been on my immediate 'to do' list for ages, and kept being put off by the lack of an appropriate occasion (a familiar tale: did I really think that husband and I would eat so calorifically every week?). Anyway, an occasion presented itself, and was made even more pleasurable by the inclusion of this cake. Despite appearances to the contrary, I was very pleased with how it turned out. This cake is described by Mary as 'dense' and 'fudgy' and contains 6 eggs, most of which were separated and relied upon to work different kinds of chemistry and different stages. (That just means that I whisked and added the whites separately!)

I was a bit worried about scrambling the eggy mixture by pouring the melted chocolate into it, but it didn't appear to create any problems. It was all very satisfying to mix, and pretty straightforward really. I baked it for the required 50 minutes; perhaps I could've braved less and then it wouldn't have cracked - I was just worried about the egg content and wanted to ensure it was cooked through without risking open-oven sinkage. The cracking, and resulting near-disintegration when I released it from the base of the tin was quite alarming, but actually didn't matter a jot once it was iced. The thrill of this cake isn't an aesthetic one; it's all in the eating and the texture. That said, I did fear a large-scale collapse once I'd got to the spreading of the apricot jam and then the icing, but both acted like the required glue to help hold it all together. Of course, once it had set, there was no chance of it falling apart. It was just very difficult to move around, from tin to rack, to cake stand!

Baker's verdict: absolutely divine. I'd be less stressed about the look of the thing next time, because I know it all turns out alright in the end. I'll definitely make it again: this has been my favourite cake to eat so far. We both thought that it was like something you'd buy in a cafe - maybe I should start trading...
Husband rating: 9.5/10. Loved it. Chocolate nice and thick; not the best looking cake but really tasty.

Thursday 24 May 2012

16. Tarte Tatin

Not the most photogenic of bakes, and, as it turns out, not the most successful either, this was my first attempt at this French classic. I've dabbled with pastry from time to time, and was actually really surprised to find that the foundation of this was a shortcrust one. I'd always thought Tarte Tatin was made with puff pastry, and anticipated lots of fiddly rolling and buttering. The pastry, it being short and all, was easy to make; an egg yolk added to make it richer and popped into the fridge for an hour or so until I was ready to make it for Sunday dinner dessert. Lots of apples were needed - about 950g (a standard supermarket-sized bag of 6), and it turned out to be a bit of a problem that the variety I used were really juicy. When it came to draining the juice off the tart once it had baked, the mixture was all juice and no caramel.

It was all very straightforward really, but one thing I've never had experience of, is making caramel. It seemed to take ages to thicken, and being the impatient so-and-so that I am, I cranked the heat up and was then lucky to save it before it got too dark and burnt. I think it was rather more 'over' than 'on' by the time I poured it over the apples, and there were some chewy, toffee-like bits to get our teeth around, which weren't very nice. Another issue I had was with the flipping of the tart onto a plate; I can never do this, be it with a cake or anything else. I'm naturally cack-handed; it doesn't help trying to do plate gymnastics wearing a bloomin' great oven glove either.

Baker's verdict: a bit of a fiddle; the processes were quite awkward in some ways, although the preparation of the ingredients was fairly simple. Tasted pretty good, but I'm not falling over myself to make it again in a hurry. More of a box-ticking exercise really!
Husband rating: 7/10 - didn't like the 'toffee' on top; loved the apples; pastry was nice but not really what was expected of a tarte tatin.

Monday 21 May 2012

15. Sultana Malt Loaves

Several months ago, I developed a craving for some malt loaf, and was pleasantly surprised to find a really cheap 'value' version in a local supermarket which managed to satisfy my appetite for the chewy, sticky 'lump' that is this particular breed of cake. However, I was looking forward to making some of my own, and curious to see how it would turn out.
My first challenge was finding a jar of malt extract; eventually tracked down in a health food shop. My Dad tells me they used to feed him and his fellow pupils this by the spoonful at school; can't say that appeals after smelling the stuff!
The cake was fairly easy to make; it was handy having some cold tea stewing away in the pot to save fiddling about with that. It made two moderately sized loaves, full of sultanas, and possibly even a bit of scrambled egg: pouring the hot malty, treacley mixture into raw egg wasn't the best idea! It wasn't the easiest mixture to mix well; I thought I had, but there were a few floury bits in the loaves once they'd been baked. Not that it affected the taste/texture though; they were quite pleasant really, and did what it said on the tin.
Baker's verdict: turned out well, but didn't bowl me over. If I'm going to give myself extra butter, I'd rather do it by eating something tastier than these.
Husband rating: 7/10. Nice - especially with some 'vegetable spread' on them.

Monday 16 April 2012

14. English Muffins

I'd been wondering when to bake these muffins for weeks; they're not really the sort of thing you take into work to share around and the idea of Joe and I wading through a mountain of muffins didn't appeal. Then I remembered the wonderful invention which is the freezer, and thought that it couldn't hurt to deposit half of them therein.
In true baker fashion, I got up early on a Saturday to make these. There I was, bustling about the kitchen in my jim-jams, preparing our daily bread. Grandad would be proud, but would note my poor time-management. As if they would ever be ready for eating at a civilised hour for breakfast!
They were very easy to make - I didn't even break a sweat about the 'tepid' milk, just put the jug in the microwave for 30 seconds and decided that would do. Maybe I was wrong, and bad things happened to the dough as a result, but it didn't cause me any anxiety. What did, was the temperature of my 'warm place' for the proving. I'd heated the oven a bit, then switched it off, but worried about the clingfilm melting into the muffins. It didn't.
After an hour, they'd puffed up nicely. First hurdle over. The next process was more worrying: cooking them on a griddle rather than in the oven. Here, I have to have a grumble about the Baking Bible. It doesn't decree with enough precision. 'Heating' the oil and then 'turning down the heat' are not helpful suggestions for the beginner baker. Thus, I found myself in trial and error territory, which isn't a bad thing, but without reassuring 'don't worry if it's a bit doughy' or pictures, I don't really know whether I've done something wrong or that's how it's supposed to be. One thing I will say is that they looked bloody good. They puffed up even more, and I liked the griddle effect. The big worry was the doughy middles. Were they cooked enough?

We experimented a bit and put some in the toaster, to try and crisp up the soggy middle: still decidedly doughy. The only point of comparison either of us had were the Big M muffins, which we know as quite light and fluffy (but maybe that's what chemicals do to your muffins). They were certainly less stodgy when they'd cooled a bit; actually I quite liked them this way. I like a bit of chew to my bread. They were quite bland tasting, but satisfying when smothered in butter.
After having one with a fried egg in for breakfast, we saved a few for eating with soup for lunch. It was very satisfying to have homemade soup and bread and they really came into their own when dunked into a bowl of hot soup.
I had one for breakfast the following day, with apricot jam on, and as a sort of scone with cheese later: both yummy. The remaining six have been frozen, ready for breakfast next weekend. We'll see how well they cope with this.
Baker's verdict: fun to make; doughy inside and not sure if they were meant to be. What did I do wrong?
Husband rating: 4.5 - didn't really like them. Too doughy and lacking in seasoning.